Installation of a water heater in your home need not be a herculean task but you need to consider understanding the basic plumbing tips and tricks that might come in handy during the process. If you are someone who loves and believes in DIY, it would be easy for you to adjust to the overload of information and the installation. If at all you personally don’t enjoy the process, you could call in the professional team to install a water heater.
Electric water heaters tend to only last 8 to 10 years before a need arises to be replaced. You need not jump to conclusions about your water heater replacement just because it has leakage issues. It is important to troubleshoot the problem and understand what exactly is the issue before buying a new water heater. Many times a leak can be repaired. The leaks and their positions are the ones that decide whether or not you need a replacement. There is a basic level of preparation that is required when you have decided to get the electric water heater installed all by yourself. Since there is a lot of work with electricity and plumbing, if at any point you feel uncomfortable, do not hesitate to call the top water heater installation in Tustin CA.
So here we will be discussing the step by step approach of installing the water heater in a safe and controlled manner.
1. Disconnecting the electricity
The first and foremost step of course is the safety precaution. This is achieved by turning off the electricity to the water heater. To make sure that there is no flow of electricity, you could use a voltage tester. Usually, once the circuit breaker panel is shut down, it pretty much will shut any electric flow through the appliance, which is your green signal to move forward to the next step.
2. Draining out the tank
The next important step is to drain the water faucet to let out water which is warm up until cold water hits the ground. Usually, people use a hope pipe to attach to the water heater and drain the warm water to buckets or other needs. This step is important to avoid any fatal burns from warm or hot water. The valves could also be opened for the process to be faster than the normal draining process.
3. Remove and disconnect wires
The electric wires on the top of the water heater need to be removed and disconnected so that there is no aftershock and it is deemed important and significant. Cap the wires off and label (or take a picture) of them to avoid any future confusion when you are hooking your new water heater up.
4. Disconnect the plumbing system
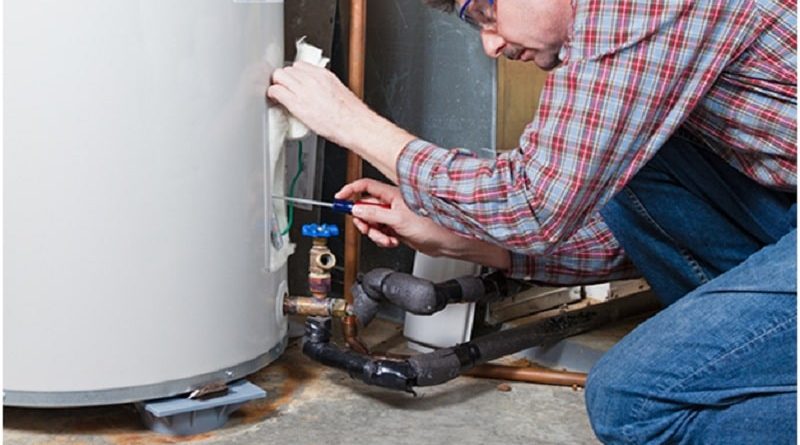
There is the necessity of cutting off the warm and cold water supply lines so that there is space for new plumbing infrastructure. Depending on the material used for plumbing, there are further processes. For example, if copper is used to plumb in your water heater, you may need to cut down the pipes. If the T&P discharge pipe is in good condition, you can remove it from the T&P valve and reuse it on your new water heater and save more money expenditure.
5. Remove the old heater
The next significant step is to remove the old heater. Once the tank is empty, the water heater which is old has to be removed. There is no requirement to set the new tank in the same place, in fact, it is recommended to set up this in a different place. You need to check that your electrical supply will be adequately reaching the tank. This could be double checked and then you can access the panels and the drain valve for maintenance.
6. Reassess the plumbing lines
You need to look thoroughly through the plumbing lines and if necessary re access them and replace them accordingly. If the material used in the pipes is copper there is a high rate of corrosion and this could be removed from the pipes by vigorous rubbing of the sandpaper. This will surely leave the pipes to shine brightly.
7. Electrical wiring setup
After the above mentioned step, you need to fetch for your junction boss cover which could access the electrical wires. There are lots of wires with multiple colored wires which along with wire connectors would be great to follow them. You could use the previous wire connections as a guide and connect the wires in the same way you removed them.
8. Supply lines attachment and turning the water on
Now is the time to connect both the cold and hot water supply lines all together. Be sure to double check which valves you are connecting so that it is easy to fix and no mistakes are made on the line. If the material is copper, you may have to plumb it again with copper piping. There is a high recommendation of using hoses to make the necessary connection which could also be a great safety feature for earthquakes. You could attach the flexible hoses to the nipples on the water heater. In most cases, there is a need for plumbers tape and other types of connectors to help attach hoses to the valves. These fittings will help reduce the corrosion between the two different metals in the scene here.
9. Turning on the power back up
So after the water heater tank has filled with enough water, you could turn on the circuit breaker at the main power box. There are a couple of safety precautions to be kept in mind such as turning on the power before the tank has completely filled could lead to electric elements causing a dry fire. This could totally ruin the entire electric heating element.
10. Bleeding the water lines out
There is a high chance of air getting in the tank while plumbing and allowing the hot water to keep running for the initial time helps in getting these out without any problems. It may also take quite a few minutes than usual to get the water heater all heated up thoroughly.
So these are some of the most essential and easy do it yourself tips and tricks that could help with the water heater installation. If at all any time you feel like there is a huge problem with the process, be sure to call in professional help. The installation does seem very easy but it is extremely organized and needs knowledge about electricity and plumbing to a basic level for the process to be safe and secure.
Each of these steps is very much like a guide so that you could follow these to get the water heater installation to be easy and comfortable. The work in itself could be enriching to do all by yourself but hiring a professional team when you think you can do would be of more benefit as there will be no damage caused to you or the plumbing structures for a while.
Jacqueline is a content marketing manager who formerly worked at Cali’s Choice Plumbing & Restoration. She is a writer, editor, and content strategist for plumbing services. Making her knowledge and skills a power, she amplifies the readers’ knowledge about the ways of water leak and slab leak detection and their reciprocation.
Through her articles, she shares the most successful tactics and strategies of slab leak repair, mitigating blockages through Hydro Jetting, and AC & heater installation tips to the audience.


