What’s Liquid Screed?
Liquid screeds, also known as flow screeds, are ready-mixed compounds that are applied over flooring surfaces. They are used to smooth and level a flooring surface so that finishing materials such as carpets or tiles can be applied evenly. The screed is commonly made up of calcium sulphate and water, which in combination becomes gypsum. The reaction can last for around a week until all the calcium sulphate is used up, by which time an extraordinarily durable and levelled sub-floor is created.
Liquid screed has become a popular option for extensive scale floor levelling and sites with under-floor heating. With no vibration or work necessary to remove bubbles and density the liquid, the liquid screed will have a more even surface than traditional screeds such as cement.
Moreover, liquid screed plays a vital role in heating systems. As a result of the density of the liquid screed, heat is conducted more efficiently. Since heat is transferred through the flooring materials, the faster it reaches the room, the quicker the room will reach its target temperature. In addition, it covers the entire heating system without the gaps or bubbles in traditional screed, which slow or prevent heat transference. In this sense, the liquid screed also benefits from better coverage of the floor, which can again make for better thermal conductivity (heat transference).
How’s it Used?
Liquid screed can typically be used for flooring on a structural substrate. Substrate refers to the surface of materials that form the construction site. For example:
- Concrete that has been poured directly into the building.
- Beam and Block: Concrete blocks that have been placed onto beams.
- Precast Planks: Slabs of concrete interspliced with hollow cavities usually manufactured off-site and delivered to site, then craned into place. Screed is then laid on top to give a final levelling layer.
- Metal decking can also be screed when metal is bonded to concrete.
What all this means is that the liquid screed itself isn’t usually structural. Instead, it’s used to provide insulation or a flooring surface for residential and commercial buildings in the Gloucestershire area, Reading or for that matter any other area. The steps for using liquid screed are as follows:
The Process
1. Preparing the screed
As mentioned, liquid screed is carbon sulphate composition which will later be turned into gypsum, so it is essential to get the right balance of parts in the mixture. A contractor will determine just the right amount so that the final screed product is the right consistency between product batches. On the topic of batches, you don’t want to create too much or too little for your room’s size. Too much screed will be a waste of money as often, and excess will have to be disposed of at a cost to you.
2. Prepare the room
The next step is to ensure the room or area intended to be screeded clear from debris and dust. You need to ensure that this step is complete before the next so that nothing gets trapped between the layer of screed and the water membrane (which we discuss below).
3. Lay down the membrane
A porous sheet of polyethene creates a waterproof membrane on an unbonded substrate. This is when the screed is not actually bonded to the substrate but the water membrane. It acts as a protective layer on the floor to keep any moisture from rising. The membrane edges are curled up and stuck to the walls, ensuring no gaps between the sheet. After laying the sheet, you will have a shallow, water-tight polyethene “pool” where the screed will collect. This is later reinforced with expansion foam that insulates and seals the room’s edges after the screed is poured. It will accommodate for slight movements in the screed as it warms, cools and expands.
4. Waterproofing shuttering
Is a similar task to the one above. However, waterproof shuttering aims to ensure any piping or obstacle are protected from water or screed getting inside. This is especially true for doorways or steps which need to be sealed with mastic (a silicone sealing foam) or expansion foam.
5. Securing the under-floor pipes (heating)
If there is under-floor heating, the pipes or trays will need to be secured inside the water membrane. Non-piercing waterproof clips are used to seal the polyethene sheeting. However, you still have to be careful that nothing floats up when the screed is poured. Ensure all the clips are attached securely to the main pipelines, then you can proceed to the next step. It is also advisable that you fill the pipes with water and vent the air out so that the pipes don’t float up during screeding or are damaged down by the weight of the screed.
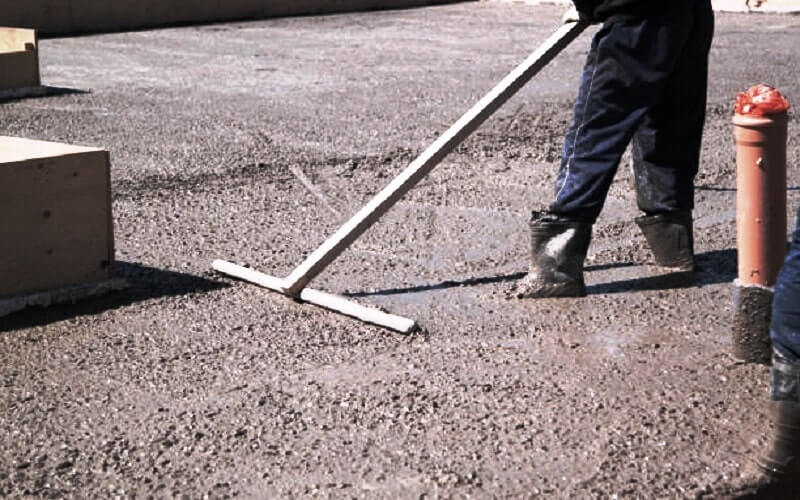
6. Pouring
Liquid screed can be poured at between 5 and 30 degrees Celsius. Contractors should arrive a little before the screed is poured to ensure that everything is sealed and work out the level at which the screed will spread across the room. To this end, screed levelling tripods can be set up at the height that the screed should reach. The tripods use a laser to measure when the screed reaches this level, which in turn informs the contractors on when to stop pouring. The pump will be set up and ready to go as soon as the screed mixer arrives. When it does, the screed is poured out across the whole area till it reaches the correct level and every crevice has been covered. The entire process can happen quite quickly—approximately15 minutes for every 25m2. Finally, once the screed reaches back to the doorway, it’s time to start the drying process.
7. Dry time
The initial drying shouldn’t be rushed at this stage. It needs 72 hours to set so that no cracking occurs. The humidity should be kept at a minimum by closing the door, so the screed doesn’t dry too quickly. At 72 hours, the screed will be hard enough to walk on, although it usually takes a week before tolerating any load-bearing structures. The exact drying time can be estimated at one day for every mm up to 40mm, and two days for depths over 40mm. You can get more accurate drying rates from your supplier. The under-floor heating, if present, can be used to speed up the process when used slowly and gradually.
8. Adding floor covering
When dried, the gypsum will deposit a thin crust called laitance. This will need to sand off relatively quickly before it hardens and so that any flooring that requires an adhesive can be laid down. Once the laitance has been removed, the floor also has to be sealed before your adhesive is applied as it is a porous surface and will absorb the moisture from the adhesive causing it to dry too quickly. This is not the case with non-adhesive flooring coverings, which can generally be laid down after the area is swept.
Conclusion
As this article demonstrates, there are several advantages to liquid screed:
- It is quick to pour
- Very level and durable
- Great for Under-floor heating
However, it is also an exact and tempestuous practice that needs the best supervision possible. To ensure your project goes without a hitch, you need the right contractor for the job. That’s why if you’re looking for liquid screed in Gloucestershire area or liquid screed in Reading and beyond, UK Screed LTD has 15 years of experience in the application of floor screed and underfloor heating systems throughout the UK. We provide highly experienced floor screeding contractors that you can rely on to deliver your project on time and within budget, without any hidden fees. We are the one-stop solution for all your screed, under-floor heating, levelling and sanding needs.